Docker for Windows (beta), Part 1
toolsDocker for Windows (beta), Part 1

Docker for Windows?
I opted into the Docker for Windows beta which is a new approach to using docker on Windows and was announced in late March 2016.
For those of you who have used Docker before you know how powerful of a tool it is.
For those of you who have tried to use Docker on Windows before
you know how difficult and quirky its configuration can be, mainly due to
having to use VirtualBox to host the Linux VM which runs Docker (the
docker-machine command is used to interact with the VMs running
the Docker engine).
This meta-layer of management goes away with Docker for
Windows because while the Linux VM still exists it utilizes Hyper-V on
Windows and basically deprecates the use of
docker-machine.
The team working on Docker for Windows has also been spending a lot of time ensuring the application can handle all the various hurdles that would normally lead to hours of configuration tweaks and debugging systems a developer isn’t familiar with.
Update (2016/06/20) It looks like Docker for Windows is being made available to the general public for download now. Get it at https://download.docker.com/win/beta/InstallDocker.msi
My Experiences
When I got my Docker for Windows activation code for the beta I instantly installed it and instantly ran into problems. I wasn’t bothered by the fact that I was still spending hours doing the exact thing I was trying to avoid by using Docker for Windows instead of the Docker Toolbox because I knew it was still in beta and I was being given a chance to help diagnose these problems so that future developers wouldn’t need to.
I’ve been participating on the Docker for Windows forums and getting a great response from the support staff. The community there seems pretty friendly and helpful - everyone there wants to see this work for everyone.
Docker for Windows currently only ships on Windows 10 editions that support Hyper-V
Here’s a list of the issues I’ve run into since first installing Docker for Windows:
Couldn’t start Hyper-V on my Macbook Pro running Bootcamp for Windows
Fixed by first booting to OSX and then restarting with Target Disk mode set to Windows partition
Couldn’t start Docker VM in Hyper-V due to networking issues related to the software VPNs I have installed for work
Progressively fixed in Docker for Windows updates
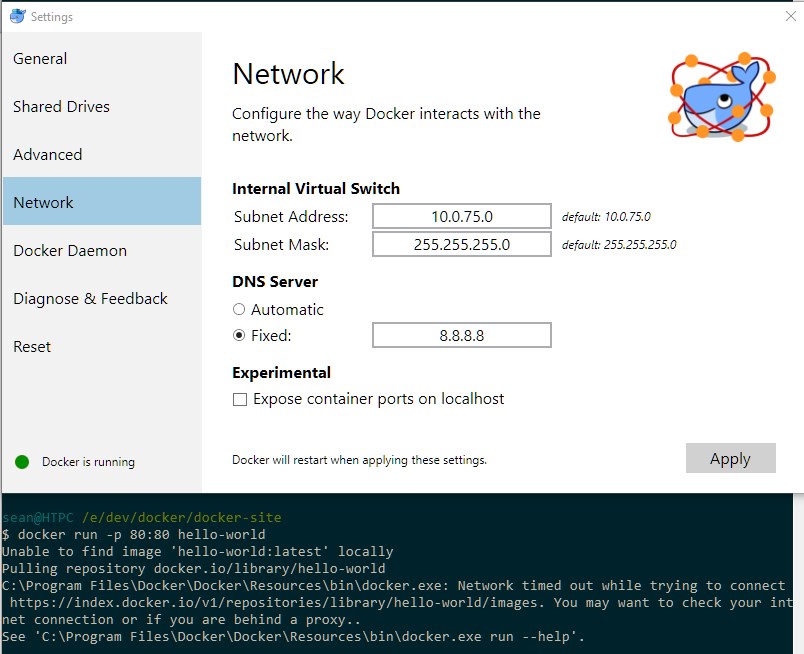
Couldn’t use docker run because Docker VM couldn’t access internet and download images
Fixed by manually setting my DNS for the Docker VM in Docker for Windows settings
Couldn’t attach a container to a volume on my host (mapping from container directory to directory in Windows)
Fixed in a Docker for Windows update
Mapping volumes in Git Bash has quirks with path expansion
Fixed by slightly modifying paths when using Git Bash (no adjustment needs to be made in PowerShell)
Despite all these issues, Docker for Windows is now at a point where it works well enough on my home PC and work Macbook that I can download images, start/stop/delete containers and map to volumes. This means my inner-loop for development tasks is pretty quick and I could see myself using docker as part of my workflow now.
An Explanation
So now let’s get to the fun part - seeing what cool benefits a developer can get from containers. We are going to make a NodeJS Express app that runs within our container but serves up files on our local file system.
Why would we want to do this? Well imagine, as a web developer, that you want to do some coding to try out a new framework, build a proof of concept or just mess around with something you think is cool.
Web development always requires a web server, sometimes needs a database and always needs these things configured if you are going to use them. What’s that? You don’t like configuring web servers and databases?
You don’t love spending sunny days indoors restarting Apache or Nginx, MySQL or MongoDB hoping your configuration tweak finally brought your celestial sphere of web development into alignment so that you could finally write a single line of code? Yeah, I don’t either!
Containers can give us those environments, application stacks and tool chains pre-configured so that we can jump straight into development.
In addition to this, the containers can also be started, stopped, deleted and re-created without affecting our application code and without forcing us to worry about permanently messing up configuration on our host system (Oops! Did I just delete that environment variable I need for my other application trying to get this one to work?).
Getting Started
Let’s run some commands!
Some of this demo was inspired by Dan Whalin’s amazing course Docker for Web Developers over on Pluralsight
You will need to be in the Docker for Windows beta, install and activate the application. Then make sure, NodeJs and Visual Studio Code are installed locally. Open up your console (I’m using ConEmu with Git Bash) and make sure express and express-generator are installed.
npm i express express-generator -gNow let’s use the express generator to scaffold out an app into a new folder docker-site
express docker-site --hbsNavigate into the new folder and install the app’s dependencies via npm
cd docker-site && npm iOpen up the current directory in Visual Studio Code to see what files we have to work with
code .Now let’s spin up a container with NodeJs already installed and configured and connect that container to our local file system
docker run --name node-demo -it -p 80:3000 -v //e/dev/docker/docker-site://var/www -w "//var/www" node //bin/bashEach of these options on the docker command is described as follows
--nameGives your container a name instead of allowing docker to assign it a dynamically generated name like
evil_brattain
-it
-igives us a way to interact with the container via ourstdinby mapping it to the container’sstdinand-tgives us a terminal for the container. See this YouTube video for a more detailed explanation
-pAllows us to specify a port mapping for the container where
80is the external port and3000is the internal port. If we have a process running inside the container that is accessible via port3000we can then access that process from our host (Windows) through the container’s external IP address/domain and port. With a mapping to external port80we can access the internal process running on port3000by requesting https://docker.local in our browser
-vMaps a volume (directory in this case) from the host to the container. The container will see any changes I make to my local directory as changes to the directory I specify in the container and vice versa. When using Git Bash we have to prefix Unix-style paths with an extra
/to prevent Git Bash from expanding them to Windows paths. In the above command I am mapping my localE:\dev\docker\docker-sitefolder to the container’s/var/wwwfolder.
-wSets the working directory inside the container for any commands to be run when the container starts. Here we are running
//bin/bashcommand from the//var/wwwdirectory.Image name & command
We specify the name of the image we want to create a container from and the command to run when the container starts.
The image name is first checked against a list of local images (running
docker imageswill list these) and then checks https://hub.docker.com. Here we are creating and running a container from the node image and running the//bin/bashcommand
After running this command we will see ourselves at the container’s command prompt in /var/www.
Now let’s see what happens when we create a file in the container
touch testFile.txtThe file testFile.txt appears in the directory tree inside Visual Studio Code! Let’s start the express site locally in the container
npm startWe can now load up the external IP:port of the container in our browser or use the domain provided by Docker for Windows https://docker.local.
We see that the express site is loading from the container and being served to our browser. The requested files are listed by the node web server inside the container’s terminal output Now open the /views/index.hbs view in VS Code and add this line to the bottom of the file
<p>Local edit served through container</p>Reload the site and see the change in the browser. We see now the benefits of changing our application files and code locally while being able to use a web stack and configuration in the container. To return to the local terminal without stopping the container or express application use this key sequence ctrl+p, ctrl+q
The container is still running so how do we get back into it if we want to restart the node server? Use the attach command
I’ve noticed that when reattaching through docker attach I need to type a key to get the terminal prompt to appear but that’s a minor issue.
docker attach node-demoNow reload the browser to see the requested files logging to the container’s terminal again. If you want to stop the express app, use ctrl+c and then ctrl+p, ctrl+q to again exit out of the container terminal without stopping the container.
In Summary
I hope this helps in understanding the purpose and significance of the new Docker for Windows application and Docker/containers in general. I’ve had a lot of fun (mostly!) exploring containers and I look forward to the official release of Docker for Windows and the release of Windows Server 2016 later this year, which will have native Docker support.
I can see Docker containers becoming a regular part of my web development tool belt, especially in the .NET world with the new modular and cross platform .NET Core framework.
In Part 2 of this series I plan to look at building a ASP.NET Core Web API app in Windows and deploying it to Windows Server 2016 as a Docker container.
